
Published :
12/16/2025 11:15:19
Categories :
Sewing Tips
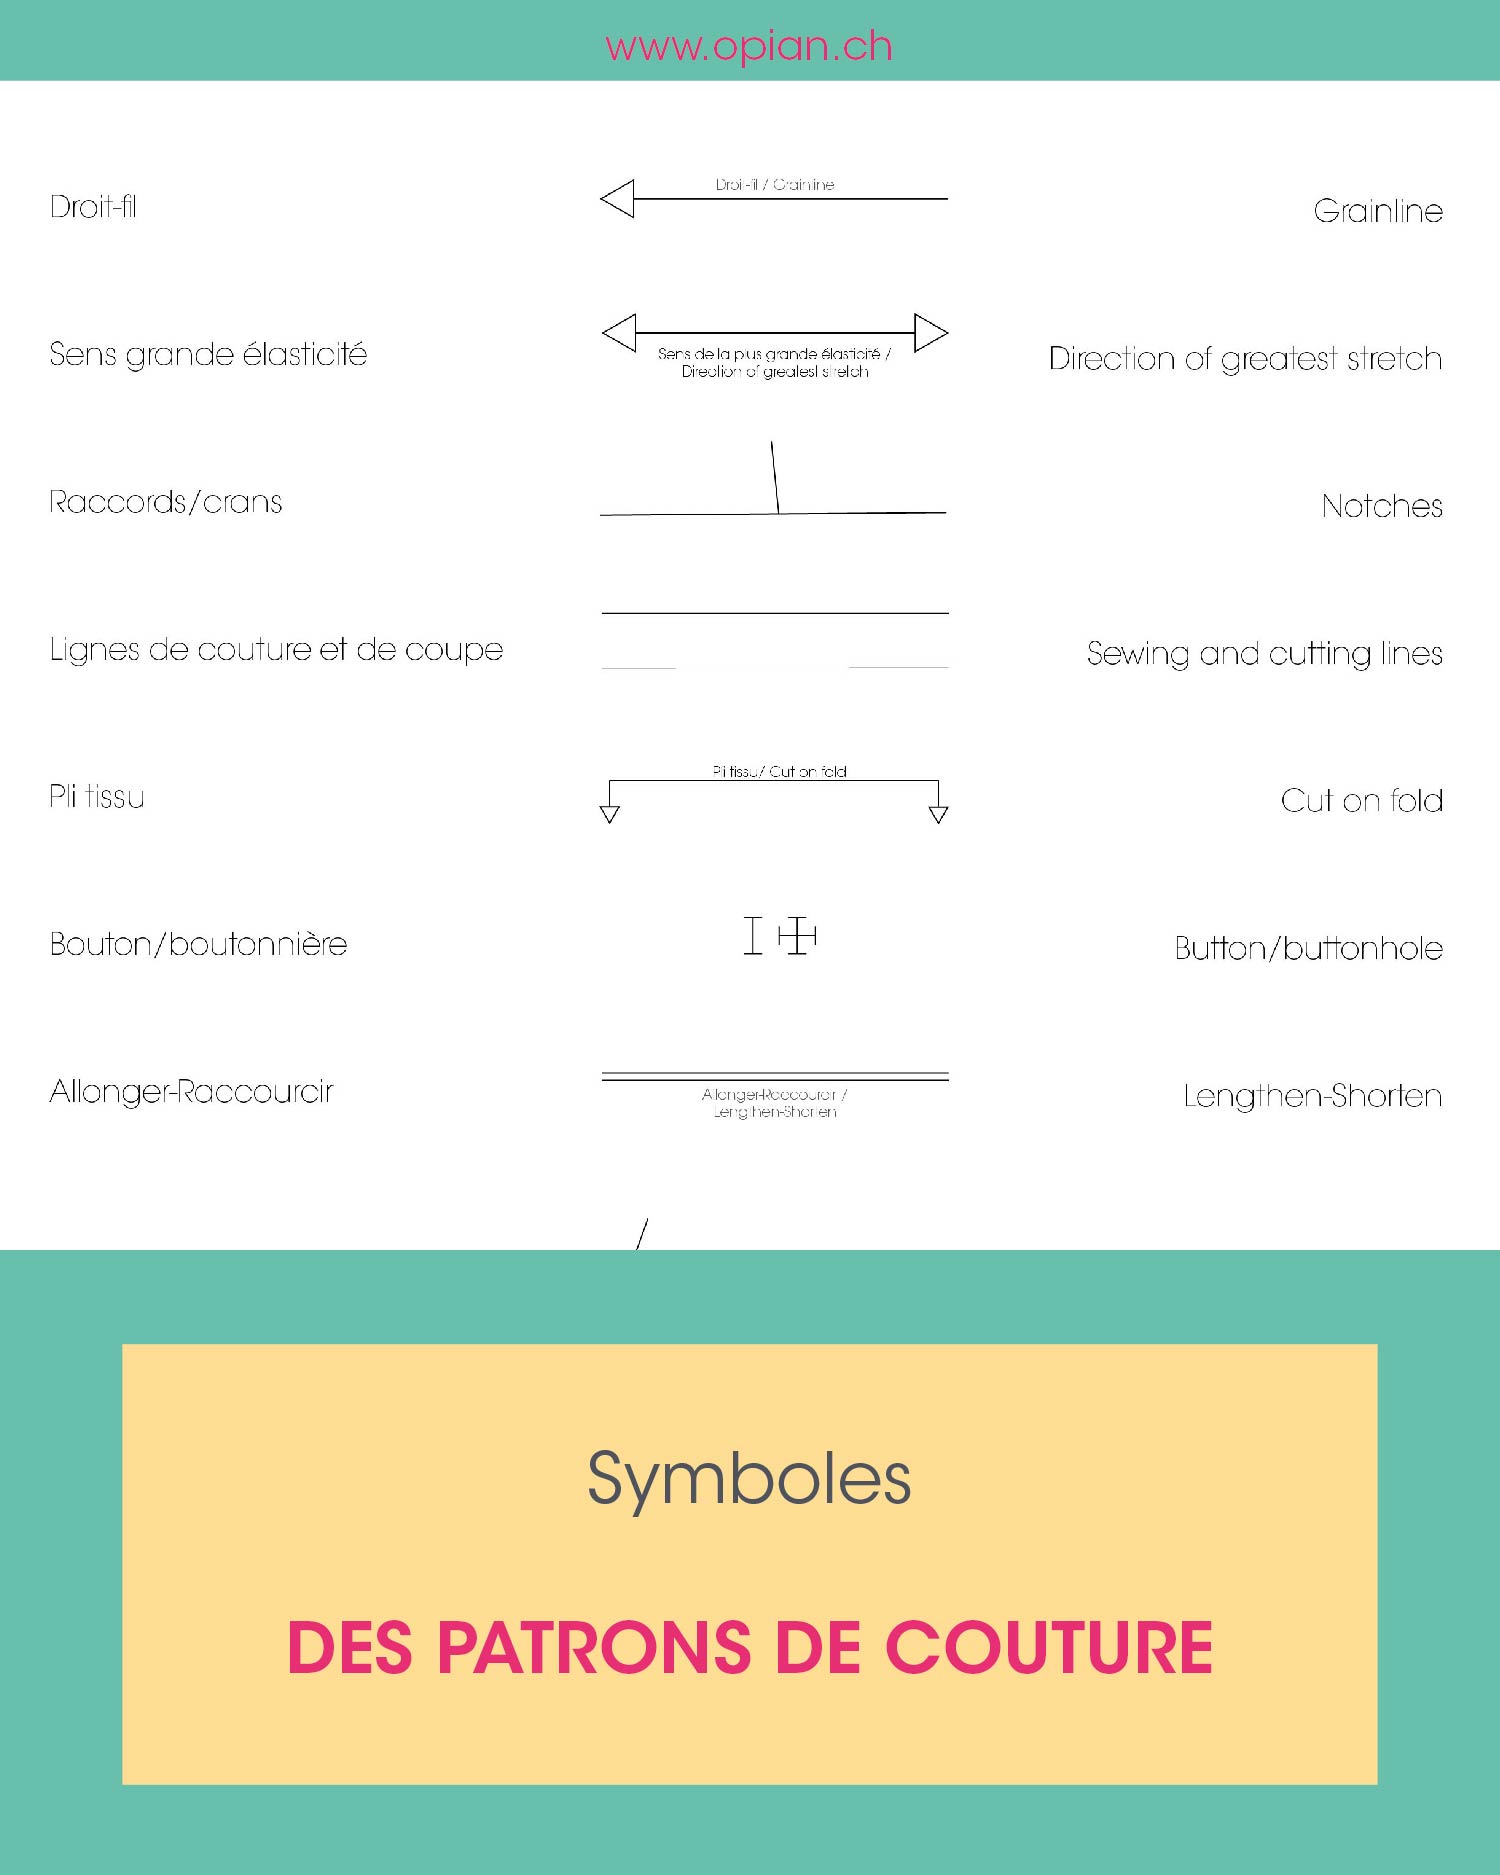
This long, downward-pointing arrow indicates the orientation of the pattern piece in relation to the fabric. It must always be parallel to the selvage, otherwise the piece will be distorted and the garment will be unstable or twisted.

For pieces with negative ease (swimsuits, sportswear), it's not the grain line that's indicated, but the direction of the greatest stretch in the fabric. This double-headed arrow must be aligned parallel or perpendicular to the selvage, but never on the bias.

These are small, straight 2cm lines that allow you to align the pattern pieces during assembly. They can be placed at a key point or in the middle of a large seam. They absolutely must be transferred to the fabric; otherwise, the assembly will be more complicated.

For the first Opian patterns, I decided not to include seam allowances, I felt it was a matter of personal preference. However, I quickly realised that people don't want to start sewing a garment by adding seam allowances to their pattern. So, I decided to include these allowances in subsequent patterns and update the earlier ones.
All sewing patterns include the pattern outline as well as 1.5cm seam allowances (unless otherwise specified). This is a lot of lines, but you can select the desired sizes on the PDF file, which makes everything easier to read. Many brands don't include the pattern outline, but I think it's the most important element of the garment; it's what defines its shape.

It is represented by a double arrow with angled edges against the pattern line, which must be aligned with the fabric fold.
The fabric fold is indicated only on symmetrical pattern pieces. At Opian, all pattern pieces (except pockets) are created in half and must be cut on the fold. This is to avoid printing and ink.

Buttons and buttonholes are represented by crosses. The center indicates where the button should be sewn.

This double line indicates where the pattern piece can be lengthened or shortened as needed. After alterations, remember to redraw the side seams.

Drawn in a V shape, the dart allows the garment to be adjusted to the body.

Pleats are indicated with two cut lines and an arrow for the direction of the fold.

Understanding these symbols and markings on a pattern is essential to avoid cutting errors and ensure a clean and precise assembly.


![]()